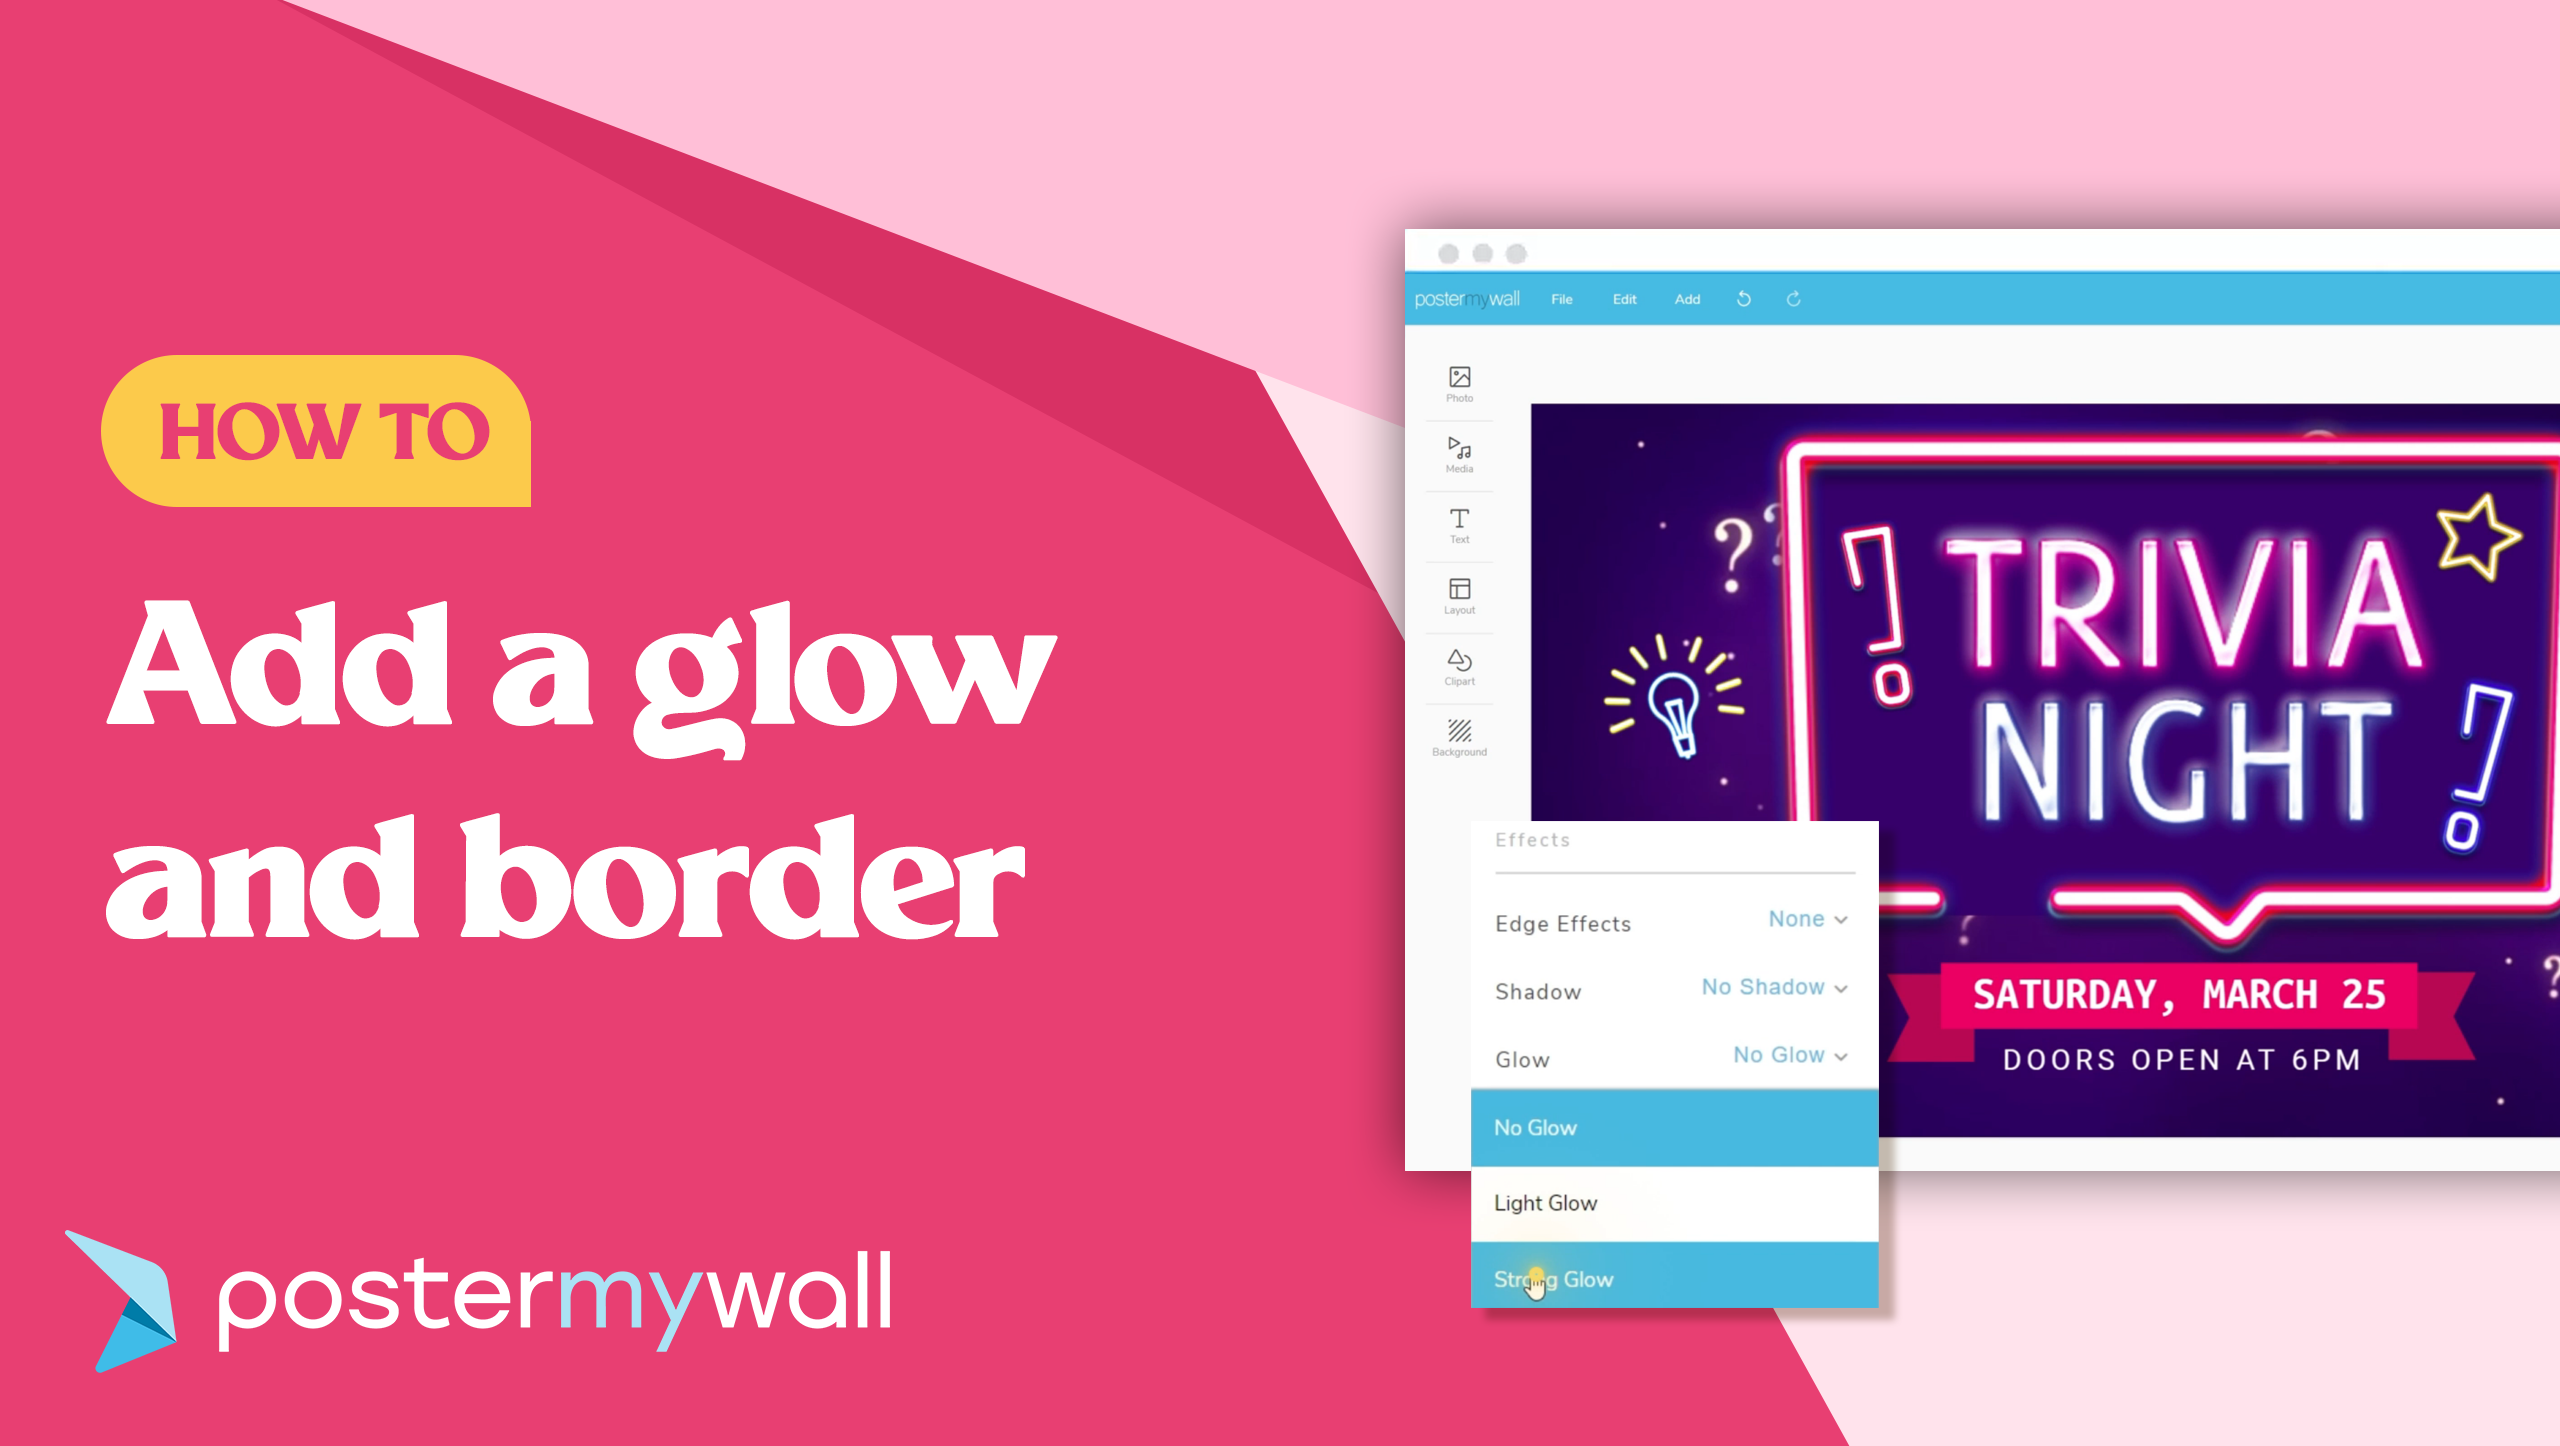
Add a glow
To add a glow to your design:
- Select an image or text item.
- In the right contextual menu, select the ‘Glow’ option under ‘Effects’.
- Change ‘no glow’ to ‘Light glow’ for a subtle glow effect or ‘Strong glow’ for a more defined glow.
- Select the color picker box to change the glow effect color. The color is set to white by default.
Add a border
To add a border to your design
- Select an image or text item.
- In the right contextual menu, select the ‘Border’ option under ‘Effects’.
- Change ‘no border’ to ‘rectangle border’ to get a rectangle border around your graphic item.
- Select ’rounded border’ to add a rectangle border with soft, rounded edges.
- Select ‘outline’ to add a clean outline around your image or text item.

- Use the color box to set your outline or border’s color.
- Use the ‘Thickness’ option to set your outline or border’s thickness.
Hopefully by now you’ve added a glow, border or outline effect to your design items. For a quick recap of the feature, you can always watch the short tutorial video at the start of this blog post.
Happy designing!